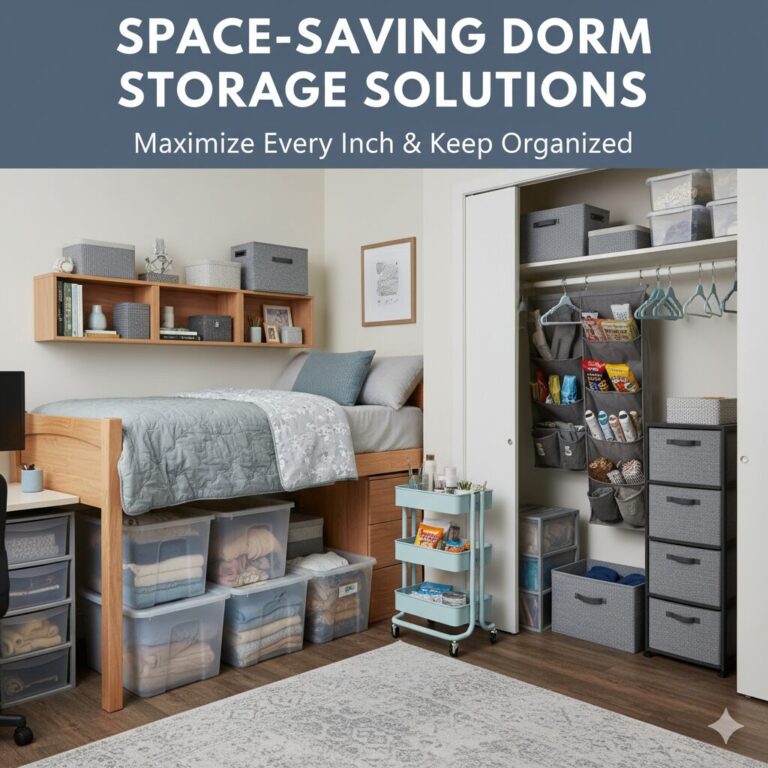
The Ultimate Guide to Space-Saving Dorm Storage Solutions
Welcome to your masterclass in dorm room alchemy. We’re about to turn the smallest, most awkwardly-shaped room you’ve ever lived in into a functional, organized, and even spacious-feeling haven. How? By waging a strategic war on clutter and wasted space.
As a former RA, I’ve seen every dorm room disaster imaginable: mountains of clothes with no home, desks buried under a semester’s worth of papers, and floors that have disappeared under a sea of… well, everything. But I’ve also seen the transformations. I’ve seen how a few clever products and a solid organizational strategy can completely change not just the room, but a student’s entire college experience. A clean, organized space leads to a clearer, more focused mind. This guide is the culmination of those observations—a zone-by-zone battle plan to conquer your dorm room and unlock its hidden potential.
Below, you’ll find a complete room-by-room breakdown covering every square inch of a typical dorm: the bed, the closet, the desk, the walls, the bathroom caddy, the mini-fridge, the laundry pile, and even the boxes you’ll pack at the end of the year. Whether you’re moving into a tiny triple, a standard double, or a coveted single, this guide is built to scale to your exact floor plan. Bookmark it, share it with your future roommate, and use it as your shopping checklist before move-in day.
What You’ll Find In This Guide
- Zone 1: The Under-Bed Universe
- Zone 2: The Closet Conquest
- Zone 3: The Desk Domain
- Zone 4: The Untapped Potential of Doors and Walls
- Zone 5: The Bathroom Caddy and Shower Storage Strategy
- Zone 6: The Mini-Fridge and Snack Station
- Zone 7: Laundry, Off-Season Clothing, and Rotation Systems
- Zone 8: Jewelry, Accessories, and Small Item Storage
- Zone 9: Cable Management and Tech Organization
- Zone 10: Storage Strategies by Dorm Room Layout
- Zone 11: The Move-In Day Packing and Setup Checklist
- Zone 12: Budget-Friendly and DIY Storage Hacks
- Zone 13: End-of-Year Pack-Up, Storage, and Sustainability
- Frequently Asked Questions
Zone 1: The Under-Bed Universe
This is the single largest, most valuable piece of storage real estate you have. Do not waste it. A standard dorm bed offers a potential 20-30 cubic feet of storage. Your mission is to utilize every single inch.
The Foundational Strategy: Get Elevated
The first step is to maximize your vertical clearance. If your university bed is adjustable, raise it to its highest setting. If not, invest in a set of sturdy bed risers. For the ultimate upgrade, a foldable bed frame for small rooms is a game-changer. These frames replace the bulky box spring and can provide up to 18 inches of pure, unobstructed storage space underneath.
Before you buy a single bin, it helps to actually measure your under-bed clearance with a tape measure rather than guessing. Dorm beds vary wildly from campus to campus — some sit on cinder-block-raised frames with nearly two feet of clearance, while others are fixed platform beds with barely six inches to spare. Write down the height, width, and depth of the open space before you shop, because a bin that’s a half-inch too tall will simply not slide underneath, and you’ll be stuck returning it during the busiest shipping week of the year. A lot of freshmen skip this step and end up with a stack of unusable plastic totes taking up closet space instead of under-bed space, which defeats the entire purpose.
It’s also worth thinking about under-bed storage in terms of “zones of access” rather than just volume. The area closest to the foot of the bed, nearest the room’s main walking path, should hold things you need weekly — shoes, a laundry hamper, workout gear. The area pushed back against the wall, the hardest to reach, should be reserved for things you touch once or twice a semester: out-of-season coats, extra bedding, storage boxes for textbooks you’ve already finished. Sorting by frequency of access, not just by category, is the single biggest upgrade most students make once they’ve lived in the room for a month and realized their first attempt at organizing was backwards.
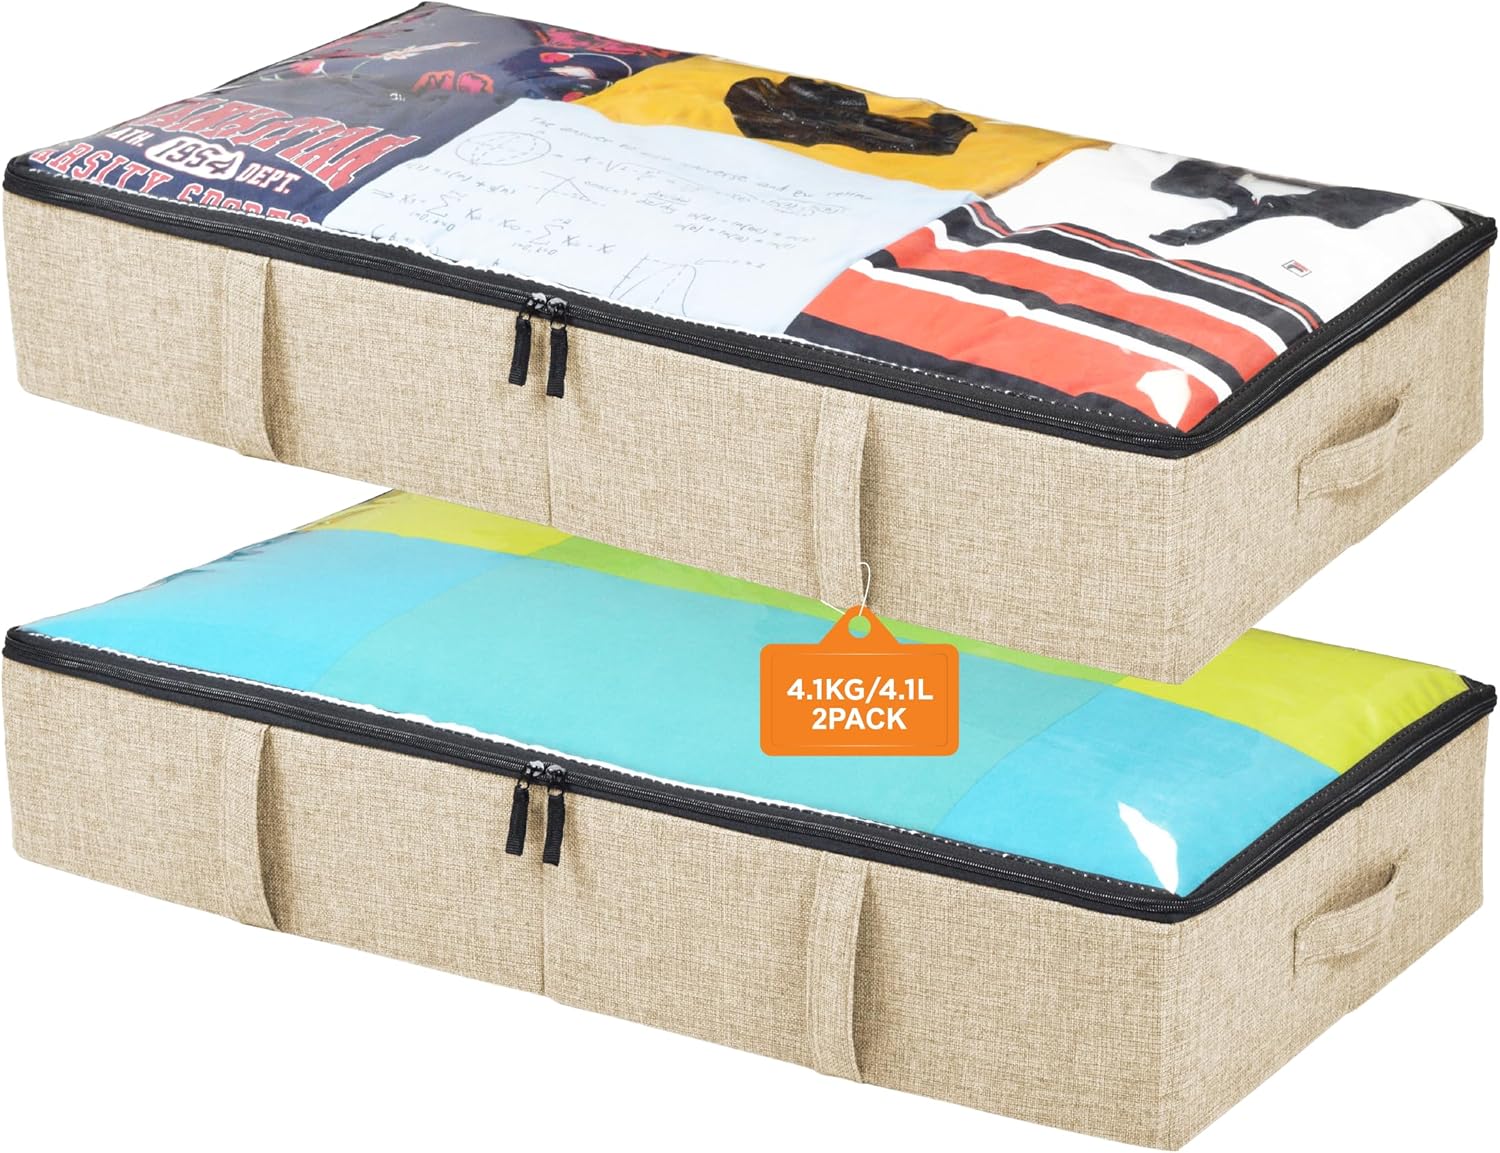
StorageLab Under Bed Storage Containers with Lids (2-Pack)
Dorm Room Reality Check: These are your workhorses. The sturdy sides and firm lid mean you can stack them, and the clear top lets you see what’s inside without unzipping everything. They are perfect for bulky items you don’t need daily.
- Seasonal clothes (heavy jackets, sweaters)
- Extra bedding and towels
- Bulk snacks and non-perishable food
- Books you’re not currently using

IRIS USA Under Bed Storage Bin with Wheels (4-Pack)
Dorm Room Reality Check: For things you need more often, like shoes or workout gear, wheels are a lifesaver. These low-profile plastic bins roll out effortlessly, preventing that awkward army-crawl to reach something at the back.
- Your entire shoe collection
- Gym clothes and equipment
- Video game consoles and accessories
- Craft supplies or project materials
Soft Storage vs. Hard Storage: Which Do You Actually Need?
One question that trips up almost every incoming freshman is whether to buy rigid plastic bins or soft, collapsible fabric storage bags. The honest answer is that you need both, just for different jobs. Rigid bins protect against crushing, which matters if you’re storing anything with structure — shoes, hats, electronics you’re not currently using, or textbooks. Soft bags, on the other hand, compress down when empty, which is critical in a room where every cubic inch matters during move-out. A rigid bin takes up the same footprint whether it’s full or empty, while a canvas or nylon storage bag can be folded flat and tucked into a drawer once summer break rolls around. If your under-bed clearance is generous, lean toward rigid bins for anything you’re worried about crushing. If your clearance is tight, or if you know you’ll be swapping items in and out seasonally, soft storage bags with sturdy zippers are the better long-term investment.
Labeling: The Step Everyone Skips (and Regrets)
Once your under-bed bins are loaded and slid into place, you lose visual access to their contents almost entirely. This is where a simple labeling system pays for itself many times over. A cheap label maker, or even painter’s tape and a marker, turns “which bin has my winter boots” into a five-second answer instead of a ten-minute excavation project the night before a cold snap. Label by category, not by date, since dates mean nothing to you three months from now but categories like “winter gear,” “extra bedding,” and “off-season shoes” will still make sense at 11 p.m. when you’re rushing to find something before an 8 a.m. class.
Zone 2: The Closet Conquest
Dorm closets are notoriously tiny. A single hanging rod and one high shelf is the standard, which is completely inadequate. The key here is to add layers and compartments to multiply your storage capacity.

Simple Houseware Double Rod Closet Organizer
Dorm Room Reality Check: This is the single most impactful product for a small closet. It instantly creates a second hanging rod, effectively doubling your space for shirts, pants, and jackets. It’s adjustable and requires zero tools to install. A true game-changer.
- Doubling hanging space instantly
- Separating tops from bottoms
- Anyone with more than 10 clothing items

Amazon Basics 6-Shelf Hanging Closet Organizer
Dorm Room Reality Check: Closets lack shelves. This simple fabric organizer hangs from the rod and immediately gives you six perfect compartments for folded clothes. No more messy stacks on the floor or that one high shelf.
- Sweaters, sweatshirts, and t-shirts
- Jeans and shorts
- Hats, bags, and accessories
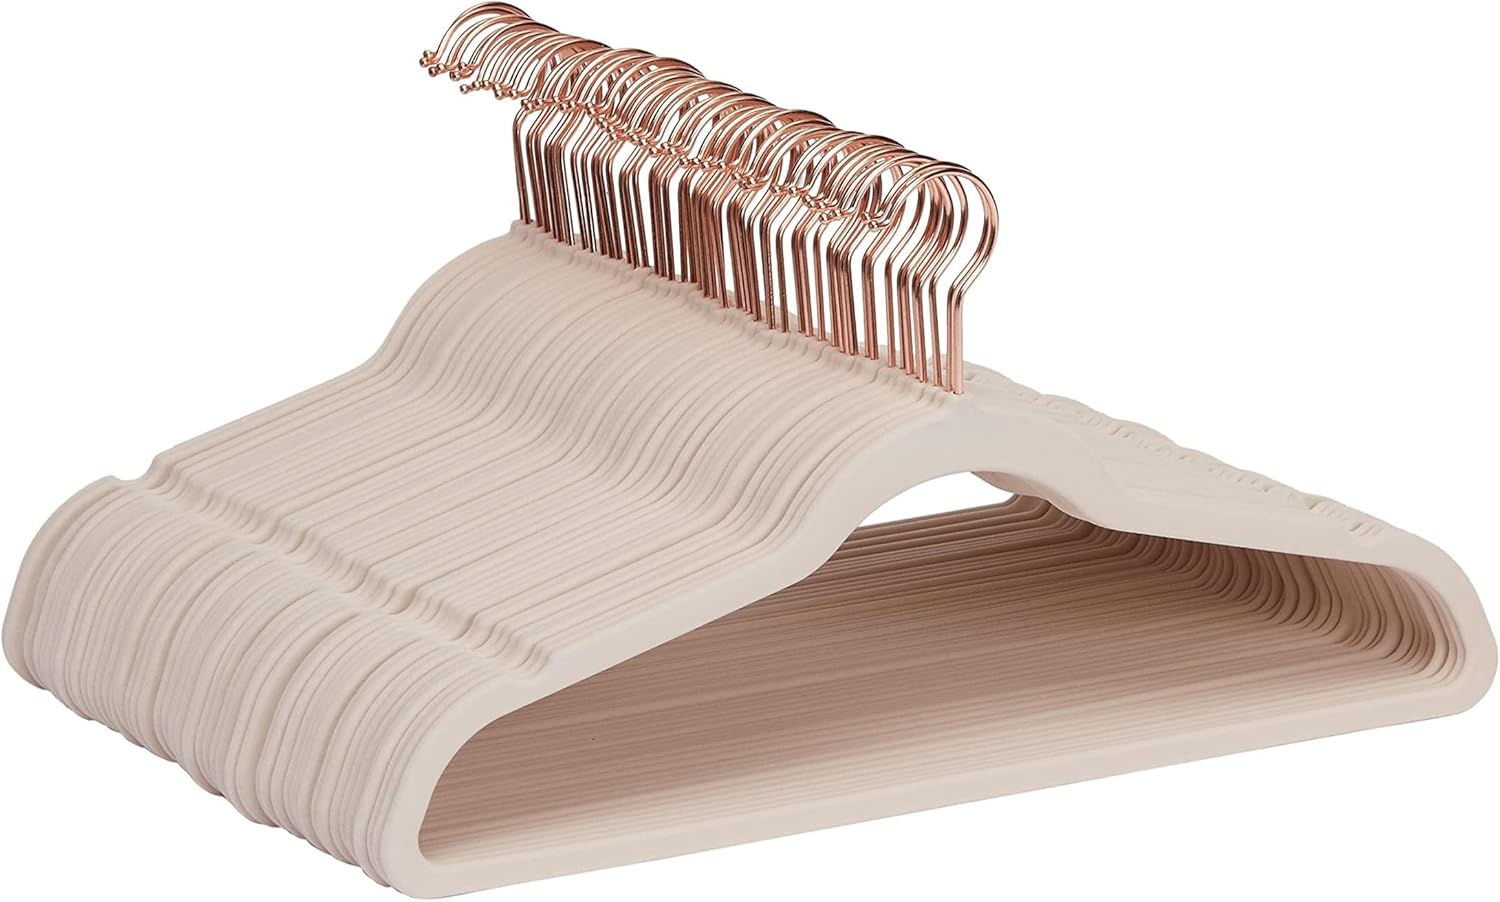
Amazon Basics Slim, Non-Slip Velvet Hangers (50-Pack)
Dorm Room Reality Check: This seems small, but it’s a huge space saver. These ultra-thin hangers take up half the space of bulky plastic or wood hangers, allowing you to fit significantly more clothes on the rod. The velvet grip also prevents clothes from slipping off.
- Maximizing rod space
- Keeping clothes from falling off
- Creating a clean, uniform look
The Floor of the Closet Is Prime Real Estate Too
Most students hang everything and forget entirely about the floor of the closet, which is usually left as an empty gap below the lowest hanging garments. This space is perfect for stackable shoe organizers, a small set of drawers on casters, or a single rigid bin dedicated to shoes you don’t wear often, like dress shoes for formal events or snow boots that only come out twice a winter. If your closet has a single high shelf above the rod, resist the urge to just toss loose items up there; a set of small stackable bins on that shelf keeps things from becoming an avalanche every time you reach for something in the back.
Fold vs. Hang: Building a System, Not Just a Pile
A closet conquest isn’t only about adding rods and shelves — it’s about deciding, item by item, whether something should be folded or hung, and then sticking to that decision. As a general rule, anything prone to wrinkling (button-downs, blazers, dresses) should hang. Anything made of a stretchy or knit fabric (t-shirts, athletic wear, sweatshirts) folds better and takes up less rod space when stored in bins or on shelves. Jeans are a personal preference, but folding them saves considerably more space than hanging, since denim is bulky on a hanger and rarely wrinkles in a way that matters. Once you’ve sorted your wardrobe into “hangs” and “folds,” the rest of the closet system falls into place naturally.
Zone 3: The Desk Domain
Your desk is your command center. A cluttered desk leads to a cluttered mind and lost productivity. The strategy is to get as much as possible off the main surface by going vertical.
The Desk Strategy: Elevate and Organize
Your desk surface should be reserved for your laptop/monitor, keyboard, and a notebook. Everything else—pens, papers, books, lamps—should be lifted onto a second level or stored in dedicated compartments. A well-organized desk makes even a tiny space feel like a professional workstation. For a full breakdown, check out our guide to building the perfect compact dorm desk setup.

Jerry & Maggie Desktop Organizer Shelf
Dorm Room Reality Check: This adjustable shelf is like adding a small hutch to your desk. It creates multiple tiers of storage for books, supplies, and personal items, freeing up your main workspace. Its configurable design means it can fit around your monitor or laptop perfectly.
- Getting textbooks off your main desk
- Creating a home for speakers or decor
- Organizing notebooks and office supplies
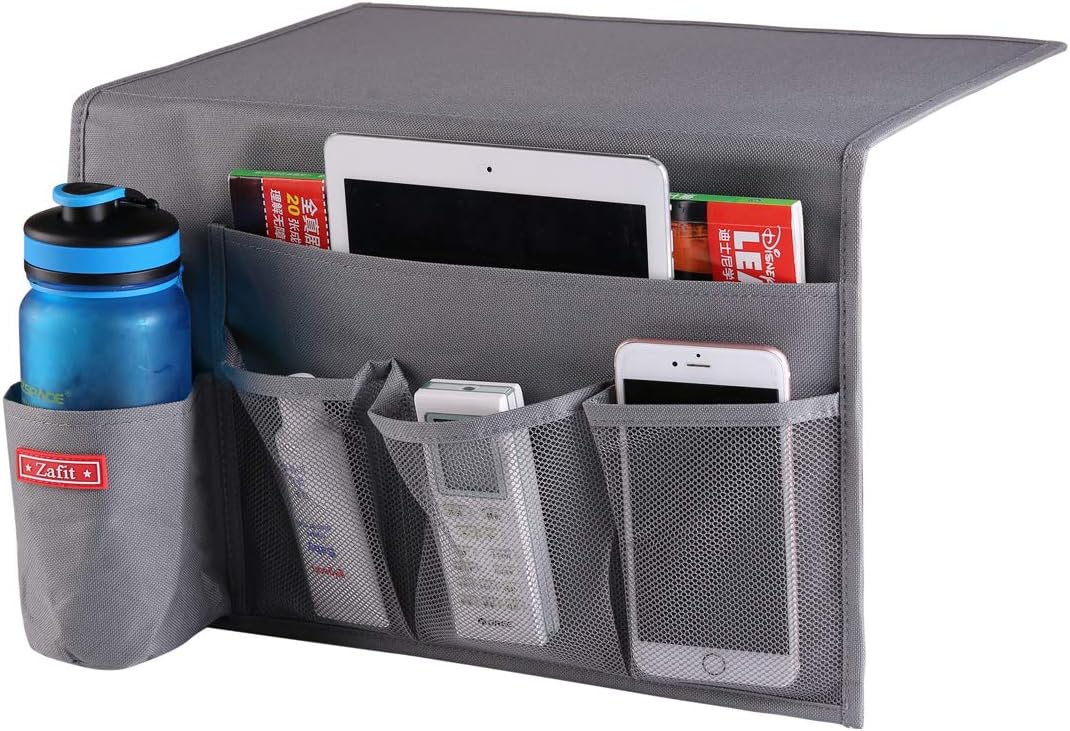
ZAFRO Bedside Caddy Storage Organizer
Dorm Room Reality Check: Most dorms don’t have space for a proper nightstand. This caddy hangs off the side of your bed frame or loft, giving you a perfect pocket for your phone, tablet, glasses, and TV remote. It keeps your essentials within reach without cluttering your desk or floor.
- Holding your phone, remote, and glasses
- Storing a book or tablet
- Anyone in a lofted bed
Drawer Organizers: The Missing Piece Most Guides Skip
Most dorm desks come with two or three small drawers, and almost every student fills them the same way: by dumping loose items in until the drawer barely closes. A simple set of adjustable drawer dividers, the same kind used in kitchen utensil drawers, works surprisingly well in a desk drawer. Dedicate one divided section to writing utensils, one to loose papers and sticky notes, and one to “miscellaneous” items like chargers, coins, and keys. Without dividers, that miscellaneous category tends to swallow the entire drawer within the first two weeks of the semester.
Lighting as a Storage Multiplier
It might seem strange to talk about lighting in a storage guide, but a good desk lamp with a built-in USB port or a small storage base does double duty: it lights your workspace and gives you one more place to tuck pens, a phone, or a pair of headphones instead of leaving them loose on the desk surface. Clip-on lamps that attach to a shelf or the desk edge are especially useful because they free up the desk surface entirely, rather than taking up a footprint the way a traditional lamp base does.
Building a Paper Filing Habit Early
Syllabi, graded assignments, and financial aid paperwork pile up fast, and a flimsy stack on the corner of the desk is the single most common source of “desk clutter” complaints from students by midterms. A slim accordion folder or a small hanging file box solves this in minutes. Sort by class at the start of the semester, and file anything you’re handed the same day you receive it. This single habit — filing immediately instead of stacking “to deal with later” — prevents more desk clutter than any organizer product ever could.
Zone 4: The Untapped Potential of Doors and Walls
In a small room, every flat surface is a storage opportunity. The back of your main door and your closet door are blank canvases waiting to be used. Cinder block walls can be tricky, but damage-free adhesives are your best friend.

SimpleHouseware 24-Pocket Over-the-Door Organizer
Dorm Room Reality Check: Don’t let the name fool you; this is a universal storage powerhouse. The 24 clear pockets are perfect for shoes, but they’re also amazing for toiletries, snacks, cleaning supplies, rolled-up t-shirts, cables, and literally anything else that’s causing clutter.
- Shoes, snacks, toiletries, cables
- Basically anything small and homeless
- The back of your closet or room door

Command Picture Hanging Strips & Hooks Variety Pack
Dorm Room Reality Check: Nails are forbidden. This variety pack of Command products is non-negotiable. Use them to hang posters, hats, keys, towels, and lightweight organizers. They hold strong and, crucially, they remove cleanly at the end of the year, saving your security deposit.
- Hanging decor without damaging walls
- Creating a spot for keys and lanyards
- Hanging towels and jackets
Ceiling and Loft-Level Storage
If your bed is lofted, or if your room has a genuinely high ceiling, don’t stop your storage plan at eye level. A slim hanging organizer that clips to a loft bed’s frame near the ceiling can hold lightweight, rarely-used items like an extra blanket or a duffel bag, keeping them off the floor entirely without adding weight to a shelf that might not support it. Just be mindful of your school’s fire-safety guidelines, which often restrict hanging fabric too close to overhead lighting or sprinkler heads.
The Back of the Closet Door: An Extra Wall You Forgot About
Beyond the main room door, the inside of your closet door is functionally a second wall that most students never use. A slim over-the-door mirror with built-in storage pockets, or a second over-the-door organizer dedicated purely to accessories like scarves, belts, and jewelry, turns dead space into one of the most efficient storage zones in the whole room.
Zone 5: The Bathroom Caddy and Shower Storage Strategy
If you’re living in a dorm with a shared, community-style bathroom, your entire toiletry collection needs to travel with you every single day. This is a completely different storage challenge from a private bathroom, and it deserves its own system.
The Caddy Strategy: One Bag, One Trip
The goal of a shower caddy isn’t just to hold your shampoo — it’s to let you make exactly one trip down the hall and back, every single time, without forgetting your towel, your flip-flops, or your soap. A caddy with a solid, drainable bottom (rather than a mesh bag that lets everything pool with water) will last far longer and won’t grow mildew by week three.
Community bathrooms mean your shower gear gets wet, then gets carried back into a dry dorm room, which creates a recurring moisture problem if you’re not careful. Look for a caddy with drainage holes or a quick-dry mesh design so you’re not setting a dripping bag down on your carpet or desk every morning. A small over-the-door hook just inside your room, dedicated only to the shower caddy, keeps it from ending up on the floor or on your bed, both of which introduce bathroom moisture and bacteria to spaces where you sleep and study.
Beyond the caddy itself, think about a secondary “reserve” system for toiletries you don’t carry daily — extra bars of soap, backup toothpaste, a spare razor, tampons or pads, contact lens solution. These bulk backups don’t need to make the trip to the bathroom every day, so they can live in a small bin under the sink area of your desk, in a drawer, or in a designated bathroom-supplies section of your closet organizer. Keeping “daily carry” items separate from “bulk backup” items is the single biggest quality-of-life upgrade for anyone dealing with a shared bathroom for the first time.
Towel and Robe Storage Without a Towel Bar
Most dorm rooms don’t come with a towel bar, which means a wet towel either ends up draped over a desk chair or, worse, balled up on the floor. A single Command hook or a slim over-the-door hook dedicated to towels solves this instantly, and keeping it separate from your clothing hooks prevents your dry clothes from picking up dampness or a musty smell.
Managing Toiletry Overflow in a Shared Sink Area
Even in dorms with a private or semi-private sink, counter space is usually limited to a few square inches. A small two-tier turntable or a slim stackable tray keeps toothbrushes, floss, and skincare products contained to one footprint rather than sprawling across the entire counter, which matters even more if you’re sharing that counter with a roommate.
Zone 6: The Mini-Fridge and Snack Station
Food storage in a dorm room is its own puzzle, split between what needs refrigeration and what can live at room temperature. Getting this zone right means fewer wasted groceries and far less clutter on your desk.
Most mini-fridges provided or approved for dorm use are compact, often in the 3.0 to 4.5 cubic foot range, which means every shelf has to be used deliberately. Stackable, uniform-sized containers work far better inside a mini-fridge than mismatched containers of different shapes, because uniform containers can be stacked without wasted air gaps between them. If you’re sharing the fridge with a roommate, a simple rule — top shelf is yours, bottom shelf is theirs, or left side versus right side — prevents the daily “whose leftovers are these” confusion that derails so many roommate relationships.
For dry snacks and non-perishables, a dedicated bin (the same kind recommended earlier for under-bed storage works well here too, just on a smaller scale) keeps your snack drawer from turning into a graveyard of half-open granola bar boxes and stale chip bags. Clear, airtight containers for things like cereal, pasta, or rice extend freshness and also make a shelf look considerably tidier than a shelf full of half-torn cardboard boxes.
The Snack Station Strategy: One Shelf, One Rule
Designate a single shelf or bin as your entire dry snack station and set a hard rule: nothing new comes in until something else is used up or thrown out. This keeps the collection from spreading across your desk, your closet shelf, and your nightstand all at once, which is exactly what happens when there’s no single home base for snacks.
Microwave and Small Appliance Placement
If your dorm allows a microwave, a compact toaster oven, or an electric kettle, placement matters just as much as the appliance itself. Elevated desk shelving, the same kind recommended in the Desk Domain section above, is a natural spot for a microwave, since it frees up desk surface for actual studying. Keep small appliances away from bedding and curtains, and always check your school’s fire-safety policy on wattage limits before buying anything new.
Zone 7: Laundry, Off-Season Clothing, and Rotation Systems
Laundry is one of the most persistent sources of dorm room clutter, mostly because most students never build an actual system for it — they just have “the pile.”
A two-bag system solves most of the chaos: one mesh laundry bag for regular loads, and a second, smaller bag reserved only for delicates or items you hand-wash. Collapsible laundry hampers that fold flat are worth seeking out specifically because, unlike a rigid hamper, they can be flattened and tucked into a closet corner on the rare day your laundry bag is actually empty.
Off-season clothing rotation is the other half of this equation. Twice a year — once when the weather turns cold and once when it turns warm — swap your entire wardrobe between “in rotation” (hanging in the closet or in a dresser drawer) and “off-season” (compressed into an under-bed bin or a vacuum storage bag). Vacuum-sealed storage bags are especially useful for bulky winter items like parkas and comforters, since they can reduce the volume of soft, compressible items by as much as 75 percent, freeing up significant under-bed space during the months you don’t need that gear.
The Rotation Strategy: Two Boxes, Two Seasons
Label one under-bed bin “Winter” and another “Summer.” When the season changes, swap their positions — the current season’s bin goes in the easy-access spot near the foot of the bed, and the off-season bin goes to the back. This two-bin swap takes fifteen minutes, twice a year, and keeps your closet from ever being overloaded with clothes you can’t currently wear anyway.
Drying Racks in a No-Dryer-Access Room
Not every dorm has convenient dryer access, and some fabrics genuinely shouldn’t go in a dryer at all. A collapsible, over-the-door or tension-rod drying rack solves this without permanently occupying floor space, since it folds flat against the door or closet rod when it’s not actively drying clothes.
Zone 8: Jewelry, Accessories, and Small Item Storage
Small items — jewelry, hair ties, chargers, ID cards, spare keys — are disproportionately likely to get lost in a small room, precisely because they’re small enough to slide into any gap or crevice. This zone is about giving every tiny item an assigned home.
A slim hanging jewelry organizer, the fabric kind with clear pockets, works well on the back of a closet door and keeps earrings, necklaces, and bracelets from tangling into a single knotted mass at the bottom of a drawer. For students who wear less jewelry but still deal with a constant flow of small items — hair clips, bobby pins, a retainer case — a small divided tray on the desk or dresser, similar to a jewelry tray but repurposed, keeps these items visible and in one place rather than scattered.
A dedicated key and ID hook near the door is one of the highest-value additions any student can make. Placed directly by the exit, it becomes an automatic habit within the first week: grab keys and ID from the hook on the way out, hang them back up the moment you walk in. This single hook likely prevents more daily frustration — the frantic search for a dorm key five minutes before curfew — than almost any other product in this entire guide.
Zone 9: Cable Management and Tech Organization
Between a laptop charger, a phone charger, headphones, a gaming console, and maybe a monitor or printer, the average dorm desk has more cables than any built-in storage was ever designed to handle.
Cable clips, the small adhesive kind that stick to the underside or back edge of a desk, keep charging cables anchored in one spot instead of sliding off the desk and onto the floor every time you unplug your phone. A small fabric or mesh zip pouch, dedicated purely to “cables and chargers you’re not currently using,” prevents the drawer-of-tangled-wires problem that almost every student runs into by the second month of the semester.
For students bringing a printer, an external hard drive, or gaming peripherals, a small dedicated tech shelf — even a single cube on a desk shelf unit — keeps these devices from spreading across the desk surface individually. Grouping “tech” as its own category, separate from “school supplies” and separate from “personal items,” makes the whole desk easier to keep tidy because you’re not constantly deciding where an individual charger or cable should live.
Zone 10: Storage Strategies by Dorm Room Layout
Not every dorm room is the same shape, and the “right” storage plan changes depending on whether you’re in a single, a standard double, a triple, or a suite-style layout. Here’s how the strategy shifts for each.
| Room Type | Biggest Storage Challenge | Priority Fix |
|---|---|---|
| Single | All storage decisions fall on one person, so mistakes compound quickly. | Invest early in under-bed and closet systems since there’s no roommate to share overflow space with. |
| Standard Double | Splitting shared zones (mini-fridge, closet, floor space) fairly between two people. | Agree on a clear half-and-half or zone-based split before move-in, and label shared bins by name. |
| Triple / Converted Double | Significantly less square footage per person than a standard room. | Prioritize vertical storage (bed risers, over-door organizers) since floor space is the scarcest resource. |
| Suite-Style | A shared common room in addition to individual bedrooms, which often becomes a dumping ground. | Set explicit rules for what belongs in the common room versus individual rooms, and use lidded bins in shared spaces so clutter stays contained. |
Triples and converted doubles deserve special attention because they’re often the most storage-starved rooms on any campus. When square footage per person drops, vertical storage stops being a nice-to-know upgrade and becomes essential. Every one of the zones covered above — under-bed, closet, desk, doors and walls — should be treated as mandatory in a triple, not optional. Floor space in a triple is simply too valuable to give up to anything that could instead be stored vertically.
Suite-style dorms, meanwhile, introduce a wrinkle that standard doubles and singles don’t have to deal with: a shared common area that isn’t “owned” by any one resident. Without an explicit conversation early in the year about what belongs in the common room, these spaces tend to accumulate everyone’s overflow clutter simultaneously. A shared set of lidded bins, one assigned per resident and clearly labeled, keeps the common room usable as an actual living space rather than becoming a second closet for four different people’s belongings.
Zone 11: The Move-In Day Packing and Setup Checklist
The single best time to set up a good storage system is before you’ve unpacked a single box, not after clutter has already accumulated for a month. Here’s a practical checklist to work through on move-in day itself.
Before You Unpack a Single Box
- Measure your under-bed clearance and closet dimensions the moment you arrive, before assuming any product will fit.
- Install the closet double-rod and shelf organizer first, while the closet is still empty and easy to work in.
- Set up your under-bed bins before sliding the bed back into place, since it’s far easier to load bins into an accessible space than to slide loaded bins under a bed that’s already pushed against the wall.
- Decide with your roommate (if you have one) who gets which side of the closet, which shelf of the mini-fridge, and which half of any shared storage furniture, before either of you starts unpacking.
- Hang your door hooks and over-the-door organizer immediately, so incoming items have an assigned home from the very first day instead of landing on the floor “temporarily.”
- Unpack seasonal or rarely-used items directly into their long-term storage bin rather than setting them out on a surface first “to deal with later.”
A surprising number of dorm room organization problems trace back to a single mistake made on move-in day: unpacking everything onto the desk and bed “just to get it out of the boxes,” with the intention of sorting it properly later. That later moment rarely comes during the chaos of orientation week, and by the time classes start, the temporary pile has calcified into a permanent one. Building your storage systems first, then unpacking directly into them, prevents this problem entirely.
Zone 12: Budget-Friendly and DIY Storage Hacks
Not every student has the budget for a full suite of matching storage products in the first week of the semester, and that’s completely fine. A number of effective solutions cost little to nothing.
Sturdy cardboard boxes, particularly the kind moving supplies or online orders arrive in, can be covered in leftover wrapping paper, contact paper, or fabric to double as attractive under-bed or closet storage at essentially zero cost. A tension rod, sold cheaply at most hardware stores, can be wedged into an awkward gap — under a sink, inside a closet corner, between a wall and a dresser — to create an improvised second hanging rod or a barrier to keep rolled towels from toppling over.
Repurposing is another low-cost strategy worth taking seriously: a shoe box becomes a drawer divider, a cereal box cut at an angle becomes a magazine or folder holder, and a binder clip attached to the edge of a desk becomes a makeshift cable holder. None of these solutions need to look improvised if you take five extra minutes to cover them in matching paper or fabric, and the money saved can instead go toward the one or two higher-quality items — like a genuinely sturdy under-bed bin — that are worth spending more on because they’ll be used daily for the entire school year.
The Budget Strategy: Spend on What You’ll Touch Daily
If your budget is limited, spend your money on the items you’ll physically interact with every single day — a solid shower caddy, a sturdy laundry bag, good hangers — and use free or improvised solutions for items you’ll set up once and rarely touch again, like long-term winter storage.
Zone 13: End-of-Year Pack-Up, Storage, and Sustainability
The storage conversation doesn’t end when the school year does. What you do in the final week of the semester determines how smooth your move-out is and how much of your organizational system survives into next year.
Start packing non-essential items — off-season clothes, decor, books you’re finished with — at least two weeks before your actual move-out date, rather than trying to compress an entire year’s accumulation into a single frantic weekend. The same bins that held your winter clothes under the bed all year can often be repacked and used as your actual moving containers, which saves you from buying separate moving boxes at the most expensive, most time-pressured moment of the year.
Before you pack anything, take an honest pass through your belongings and separate items into three piles: keep, donate, and discard. Many campuses run donation drives specifically timed around move-out, and organizations often have collection bins right in the dorm lobby for gently used clothing, unopened toiletries, and non-perishable food that would otherwise go straight into a dumpster during move-out week. This is also a good moment to reflect on which storage products actually earned their spot in your room and which ones sat unused all year — take that insight into next year’s shopping list, and resist buying a replacement for anything you realize you never actually needed in the first place.
The Move-Out Strategy: Reuse What You Already Own
Before buying moving boxes, check whether your existing under-bed bins, laundry bags, and vacuum storage bags can double as your transport containers. A system built for daily storage during the year usually works just as well for the two-week transition home.
Frequently Asked Questions (FAQ)
Q: What should I coordinate with my roommate before buying storage items?
A: Talk about shared spaces and large items. Decide who is bringing the mini-fridge and microwave. Discuss how you want to arrange the furniture. You might decide to invest in a set of stacking storage cubes together to create a shared media stand or “kitchen” area. Communication is key to maximizing the whole space, not just your half.
Q: My dorm has cinder block walls. How can I use them for storage?
A: Cinder block is tough but not impossible. High-quality adhesive hooks like the Command brand work surprisingly well if you clean the surface with rubbing alcohol first and let it dry. For heavier items, look into specialty cinder block hooks that can be tapped into the mortar joints, but check your university’s rules first. Avoid anything that requires drilling.
Q: What’s one storage mistake every freshman makes?
A: Overpacking. You simply do not need to bring everything you own. Before you even think about storage solutions, go through your clothes and belongings and be ruthless. If you haven’t worn it in a year, don’t bring it. The less stuff you bring, the easier it is to store. You can always have parents ship things or pick them up during a break if you find you truly need them.
Q: How do I organize a shared community bathroom caddy so it doesn’t get moldy?
A: Choose a caddy with a solid, drainable bottom rather than dense mesh that traps water, and let it air-dry on a dedicated hook rather than setting it straight down on carpet or a desk. Rinse the caddy itself with hot water every couple of weeks, since soap residue combined with trapped moisture is what actually causes mildew, not the caddy material itself.
Q: How do I split mini-fridge and freezer space fairly with a roommate?
A: The simplest fix is a physical split — top shelf versus bottom shelf, or left side versus right side — decided on day one, before either of you has stocked the fridge. Keep shared items, like a shared jug of milk or condiments, on a neutral middle shelf so ownership of individual items stays clear.
Q: What’s the best way to store off-season clothing without taking up closet space?
A: Vacuum-sealed storage bags are the most space-efficient option, especially for bulky items like winter coats and comforters, since compressing the air out can reduce their volume dramatically. Store the compressed bags in your under-bed bins during the off-season, and swap them back into the closet when the weather changes.
Q: How much should I expect to spend outfitting a dorm room with storage solutions?
A: Costs vary widely, but a functional core setup — a couple of under-bed bins, a closet organizer, hangers, an over-the-door organizer, and Command hooks — is achievable on a modest budget, especially if you supplement with free or repurposed solutions like covered cardboard boxes for anything you’ll rarely need to access.
Q: What should I do with my storage products at the end of the school year?
A: If you’re returning to the same school next year, sturdy items like under-bed bins and closet organizers are usually worth keeping in off-campus storage over the summer rather than repurchasing. If you won’t need them again, check for campus donation drives before discarding anything, since many organizers, bins, and hangers are still in good condition and useful to an incoming student the following fall.